How to debug Kong plugins on Windows and Mac-OS
Introduction
Kong is an open-source API management system based on NGINX, which aims to secure, manage and extend APIs and Microservices. It is written in Lua and supports a plugin oriented architecture. Debugging of Lua code is supported by different IDEs like ZeroBrane Studio http://studio.zerobrane.com/ and Eclipse Lua http://www.eclipse.org/ldt/ but nevertheless the setup of a development environment supporting debugging of Kong plugins on Windows and Mac-OS machines is not trivial.
This tutorial describes how to create an environment for creating, configuring, testing and debugging of a "Hello-World" Kong plugin both on Windows and Mac-OS. We used Windows 7/64 and Mac-OS "El Capitan", but the description should work also for newer Windows and older Mac-OS versions.
The preferred method is based on the Vagrant distribution of Kong (https://github.com/Mashape/kong-vagrant). Since there is no Windows distribution of Kong this is the only option if you work on Windows. Using Kong Vagrant images requires Lua remote debugging. ZeroBrane Studio currently seems the only IDE supporting this scenario. For Mac-OS we describe as an alternative a brew based installation at the end of this tutorial.
Prerequisites
As a prerequisite you need to install Vagrant https://www.vagrantup.com/downloads.html , VirtualBox https://www.virtualbox.org/wiki/Downloads , SoapUI http://www.soapui.org/downloads/latest-release.html and ZeroBrane Studio http://studio.zerobrane.com/download . We experimented with Eclipse Lua LDT https://eclipse.org/ldt/#installation but didn't succeed with remote debugging kong plugins running in a vagrant image.
For windows we need a Unix shell, we recommend installing git https://git-scm.com/download/win which comes with a bash shell for windows which can be started right clicking on a directory in explorer.
Setup a Vagrant Kong Image
Next we follow the documentation in https://github.com/Mashape/kong-vagrant/blob/master/README.md to setup a kong vagrant image using bash either on Windows or MacOS. First start VirtualBox, then open a terminal and run the following commands on your host machine.
# clone the Kong repo and switch to the next branch to use the latest, unrelease code$ git clone https://github.com/Mashape/kong# clone this repository$ git clone https://github.com/Mashape/kong-vagrant$ cd kong-vagrant/ |
Create an empty directory /path/to/kong/clone/ on your machine which later is mounted inside the vagrant image:
# start a box with a folder synced to your local Kong clone$ KONG_PATH=/path/to/kong/clone/ vagrant up |
The vagrant location of this mounted host folder is /kong.
# SSH into the vagrant box$ vagrant ssh |
Clone Kong to your host for debugging in ZeroBrane Studio
We need to do some preparations necessary for debugging our kong plugin:
# copy all kong lua files from the vagrant image to the mounted host folder$ sudo adduser $USER vboxsf$ cp -r /usr/local/share/lua/5.1 /kong# relocate the vagrant kong lua files, link to the mounted host folder$ sudo -i$ cd /usr/local/share/lua$ mv 5.1 5.1.old$ ln -s /kong/5.1 . |
Now the directory /usr/local/share/lua/5.1 on the vagrant image points to its copy on the host machine. Local changes there will also affect the vagrant kong installation.
Since ZeroBrane Studio can only debug files inside one source file tree (the project location) we need to copy the kong entry point into the mounted lua source tree:
$ mkdir /kong/5.1/bin$ cp /usr/local/bin/kong /kong/5.1/bin# Copy the kong configuration file to the same location$ cp /usr/local/lib/luarocks/rocks/kong/0.5.3-1/conf/kong.yml /kong/5.1/bin |
Install ZeroBrane Studio on your Vagrant image
Next we need to install the linux distribution of ZeroBrane Studio in the vagrant image , download https://download.zerobrane.com/ZeroBraneStudioEduPack-1.20-linux.sh and copy it onto the part of the file system shared with the vagrant image. Inside a vagrant ssh execute:
sh ZeroBraneStudioEduPack-1.20-linux.sh |
Create a Kong plugin using ZeroBrane Studio
Now, back to the host, start ZeroBrane Studio and set the project directory to /path/to/kong/clone/5.1, our shared copy of the kong lua files (Project/Project Directory/Choose).
Next we create a sample "HelloWorld" plugin as described in http://streamdata.io/blog/developing-an-helloworld-kong-plugin/.
First the plugin configuration located in kong/plugins/helloworld/schema.lua:
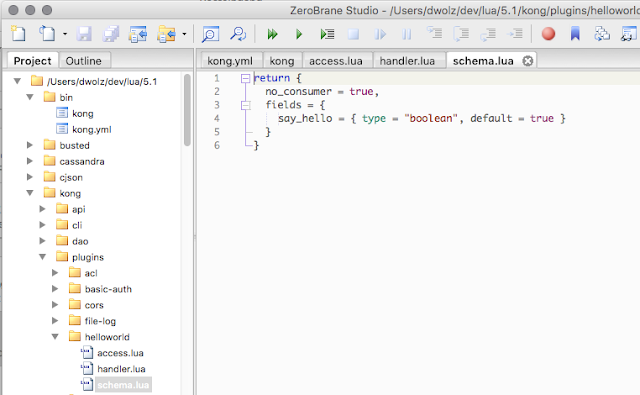
Then the handler inheriting from BasePlugin.lua in kong/plugins/helloworld/handler.lua:
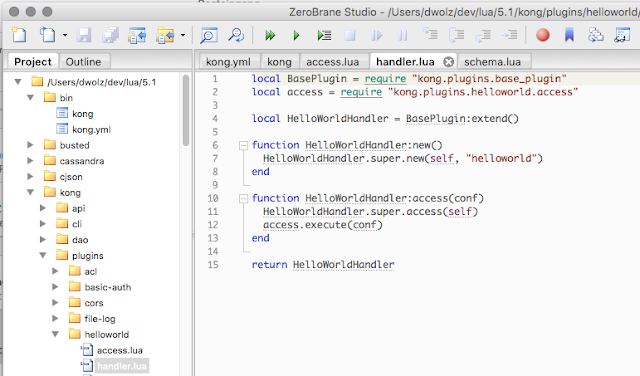
And finally the plugin implementation in kong/plugins/helloworld/access.lua:
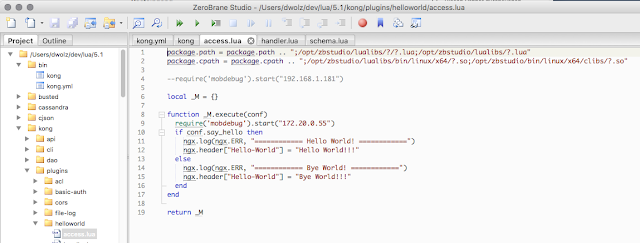
Note that we added the required path definitions for lua debugging here. You have to replace the IP adress inside the require('mobdebug').start("172.20.0.55") command by your IP adress. To find out your IP adress on Windows use
$ ipconfig |
$ ifconfig |grep inet |
We placed the require('mobdebug') call inside the "execute method". This is because this method is executed in a separate coroutine, triggered by the Mockbin webservice call. Coroutines are not debugged by default. Alternatively coroutine debugging can be enabled by adding a require('mobdebug').on() call. This has a similar effect then starting debugging from the "execute" method. Coroutine debugging is briefly covered in the ZeroBrane Studio documentation: https://studio.zerobrane.com/doc-lua-debugging#coroutine-debugging.
Next we adapt the plugin configuration section we copied earlier to bin/kong.yml enabling
the new helloworld plugin:
Start kong on the Vagrant image
Now we are ready to start kong inside a vagrant ssh:
$ cd /kong/5.1/bin$ lua kong start -c kong.yml |
Output should be similar to:
[INFO] Using configuration: kong.yml[INFO] Kong version.......0.5.2 Proxy HTTP port....8000 Proxy HTTPS port...8443 Admin API port.....8001 DNS resolver.......127.0.0.1:8053 Database...........cassandra keepalive=60000 timeout=1000 replication_strategy=SimpleStrategy contact_points=localhost:9042 replication_factor=1 ssl_verify=false ssl=false data_centers= keyspace=kong[INFO] Connecting to the database...[INFO] dnsmasq started (dnsmasq)[WARN] ulimit is currently set to "1024". For better performance set it to at least "4096" using "ulimit -n"[OK] Started |
If you later want to stop kong use
$ lua kong stop |
Register the Mockbin service and the HelloWorld plugin using the Kong API
We are ready to interact with kong using SoapUI at the host. Alternatively you may also use curl, see http://streamdata.io/blog/developing-an-helloworld-kong-plugin/, just note that the API registration command described there is no longer valid. At this page you can also find hints about unit testing kong plugins.
If we check the /apis/ path at the kong API port we see that no API is defined yet:

So we register the mockbin service at https://mockbin.com as managed API inside kong
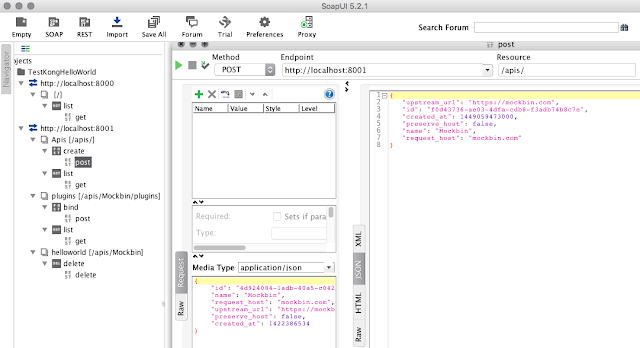
We can check whether the API was successfully registered:

Apply the HelloWorld plugin to the Mockbin Service
No plugin is bound to the Mockbin API yet:
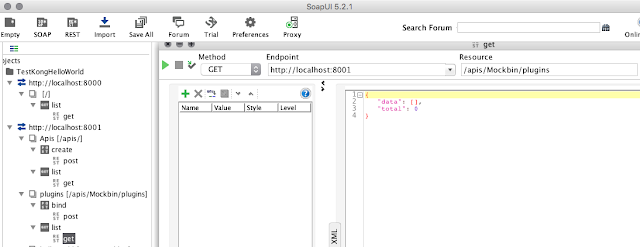
If we now call the Mockbin service via Kong we get
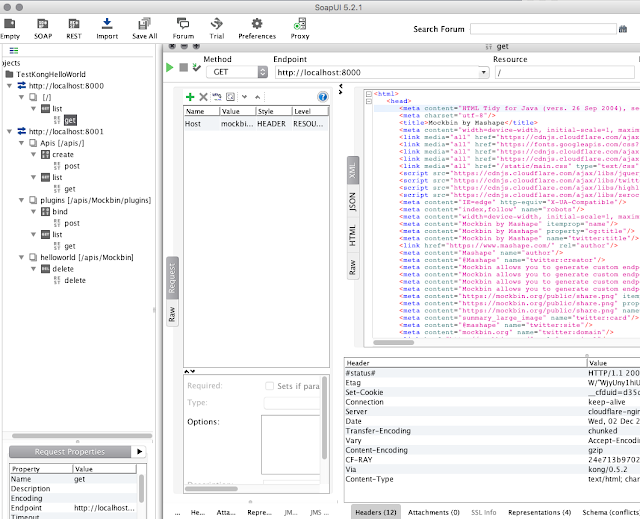
The returned header is unchanged yet.
We bind our helloworld plugin to https://mockbin.com:
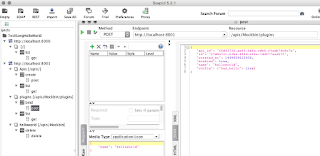
The default configuration (say_hello = true) is used in this case since we didn't transfer a configuration setting.
Call the Mockbin service via Kong
If we now again call the Mockbin service via Kong we get
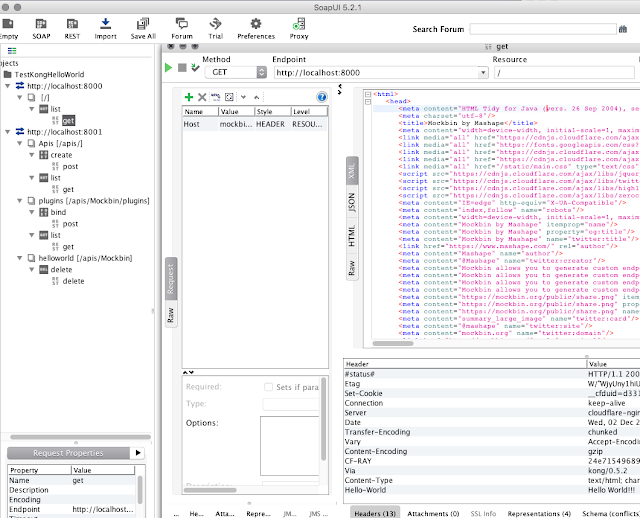
We see our "Hello-World" header property set by the plugin code.
Now let's reconfigure the plugin (say_hello = false)
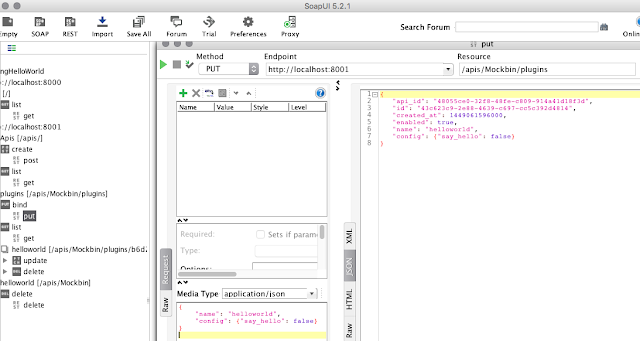
The Mockbin service via Kong now delivers
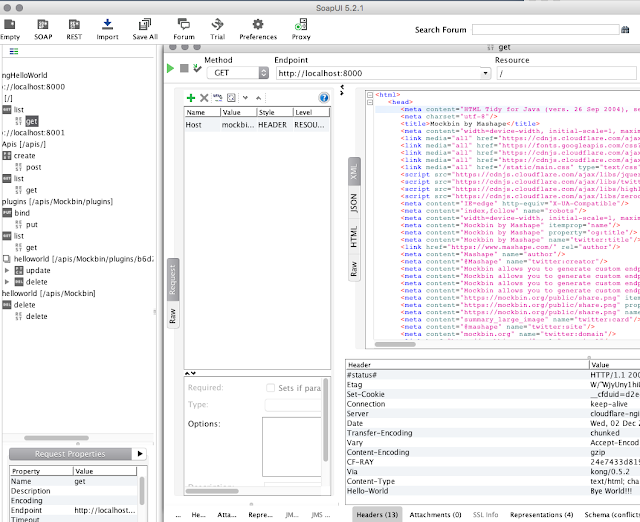
We see "By World!!!" in the returned header.
Debugging the Kong plugin
To enable debugging the plugin we start the ZeroBrane debug server inside ZeroBrane Studio (Project/Start Debugger Server) and set a breakpont inside access.lua (select the line and type F9).
When we now again call the Mockbin service via Kong inside SoapUI execution of the plugin will be interrupted at the break point:
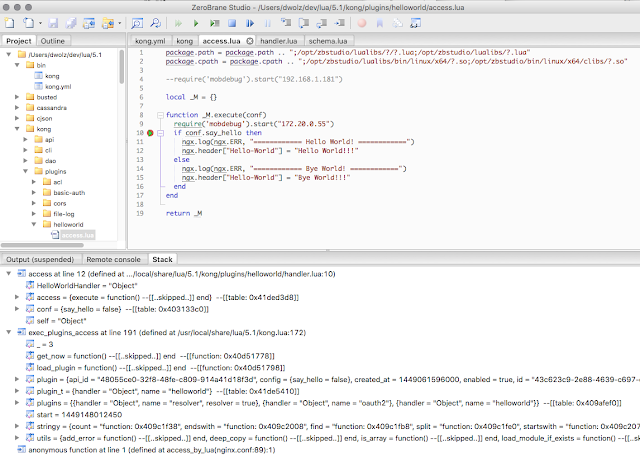
We can step through the code and investigate the call stack and the contents of the variables in ZeroBrane Studio.
Direct installation of Kong (without using Vagrant)
Installation of kong directly in windows is not possible, but on MacOS a brew based installation is supported. First install homebrew, see https://github.com/Homebrew/homebrew/blob/master/share/doc/homebrew/Installation.md#installation .
On "El Capitan" you should adjust the access rights:
$ sudo chown $(whoami):admin /usr/local && sudo chown -R $(whoami):admin /usr/local |
Then follow https://github.com/Mashape/homebrew-kong :
$ brew tap mashape/kong$ brew install kong --with-cassandra |
We observed some openssl related build problems, the following commands did fix it:
$ brew install openssl$ brew link --force openssl$ brew install kong --with-cassandra |
Keine Kommentare:
Kommentar veröffentlichen